

![]()
 |
![]()
DIABLO QUESTS
In a single-player game, the quests are randomly generated, although there is some logic in the way they are chosen. There are three quests that are present in every game: The Chamber of Bone, Archbishop Lazarus, and Diablo. The remaining quests are defined to a quest group, and a certain number of them are chosen for each game.
The quests available in multi-player games are: The Butcher, The Curse of King Leoric, and Diablo. When playing Hellfire, all of the new Hellfire quests are present in every game. |
|
||||||||||||
|
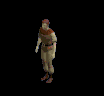
This quest is available in both single and multi-player games. "Please, Listen to me. The Archbishop Lazarus, he led us down here to find the lost Prince. The bastard led us into a trap! Now everyone is dead... killed by a demon he called the butcher. Avenge us! Find this butcher and slay him so that our souls may finally rest..." On Level 2 you will find a room with many slain and tortured bodies inside. Once you open the door, the Butcher will come for you. The Butcher is hard to run from, although running around his chamber counter-clockwise can usually gain you a bit of time, since he seems to get stuck on the left side just as you turn the corner. The Butcher is too stupid to open doors, so one good tactic is to open the door and run behind a door with gratings on one or both sides, close the door, and then pick him off from the safe side of the grate. If you are a Warrior, when he gets close to you, try to get off the first hit. With luck, you should be able to beat him to death with your sword while taking minimal damage. If you are a Rogue, open the door and run back. Hit and run while firing arrows into him until he dies. If you are a Sorcerer, open the door and make sure he sees you. Cast a Flame Wall spell in his chamber, then shut the door. He should succumb to the flames. After he dies, pick up the Butcher's Cleaver, a unique item. |
||||||||||||


| ||||||||||||
|
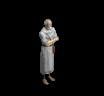
This quest is only available in single-player games. When you hit Level 2 of the dungeon, come back to town and talk to Pepin, noticing that the water in the town fountain has turned yellow. He should tell you that the water of Tristram is going bad, and that it's up to you to figure out what is going on before people become sick and die. Go back to Level 2 and look for a hole in the wall surrounded by candles. When you find this hole (move the cursor over it and it should say 'Dark Passage'), enter it to get to a level called 'Poisoned Water Supply'. Inside you should find Goatmen, Dark Ones, and other enemies. Defeat all the enemies in the Dark Passage, and the quest will be solved. Return to Pepin and he will give you the Ring of Truth as your reward. |
||||||||||||


| ||||||||||||
|
This quest is available in both single and multi-player games. "The village needs your help, good master! Some months ago, King Leoric's son, Prince Albrecht, was kidnapped. The king went into a rage and scoured the village for his missing child. With each passing day, Leoric seemed to slip deeper into madness. He sought to blame innocent townsfolk for the boy's disappearance and had them brutally executed. Less than half of us survived his insanity..." "The king's knights and priests tried to placate him, but he turned against them and, sadly, they were forced to kill him. With his dying breath, the king called down a terrible curse upon his former followers. He vowed that they would serve him in darkness forever..." "This is where things take an even darker twist than I thought possible! Our former king has returned from his eternal sleep, and now commands a legion of undead minions within the labyrinth. His body was buried in a tomb, three levels beneath the cathedral. Please, good master, put his soul at rest by destroying his now cursed form..." In single-player, enter his tomb on the third level; within the tomb you should kill all the enemies, then approach the two levers. Switch the lever on the left (east room) to open a door to a room with a couple of chests. Check the chests for useful items inside. Once you do that, go back and switch the lever on the right (west room) to open the way to the Skeleton King. Try to get to the Skeleton King as quickly as possible to kill him, for he will resurrect other skeletons if he has the chance. Holy Bolt works nicely on him, while hand to hand combat with him could prove to be fatal. You will find four crucified skeletons in the corners of the room. Make sure that you click on each one; this will open another room that contains magical items. In a multi-player game, he will be found wandering somewhere on level 3, surrounded by an extremely large number of skeletons, and you will receive a random magical item. | ||||||||||||


| ||||||||||||
|
This quest is only available in single-player games. When Ogden informs you that the sign to his tavern is missing, and that he wants it back, go down to Level 4 and search for a Dark One named Snotspill, who will tell you that the sign can be found in a chest down the hall. Search around Level 4 for a room with many Overlords and a chest inside. Open the chest to retrieve Ogden's sign. From this point, you can solve the quest via two methods. The first is to give the sign to Snotspill. He will say that he can now cast great magic, and will ambush you with Overlords. Killing him will reward you with a random magic item and access to the stairs to level 5. Or, you can give Ogden back his sign and get the Harlequin Crest as a reward. |
||||||||||||


| ||||||||||||
|
This quest is only available in single-player games. "No hurt.........no kill..me give you things.......no kill..." Venture into Level 4, and you will meet Gharbad the Weak. He will tell you that if you protect him from the enemies in the dungeon, he will give you a great reward. After he tells you this, go off somewhere else on level 4; just make sure that he is not displayed on your screen. Return to him and he will tell you that he is still crafting your reward, and will give you a random magic item to hold you over until then. At this time go off somewhere else on level 4 again and return to Gharbad a second time, and he will tell you that he is almost done. Leave again and return to Gharbad, and he will say that he has finished the item, but you must fight him for it. He is easy to kill, and when you do, pick up the random magic item he was making. | ||||||||||||

| ||||||||||||
|
This quest is only available in single-player games. "...and so, locked beyond the gateway of blood, and past the hall of fires, Valor awaits for the hero of light to awaken...." In Level 5 of the catacombs you will find a book which will speak of the warrior Arkaine, and will tell you that his armor called Valor resides somewhere in the Catacombs. Search the catacombs for a set of rooms in the shape of a cross, containing a blood altar and three blood stones. You need to pick up each blood stone and put them on the altar (just click on the altar once to place a stone). By putting the first stone on the altar, a door will open to another room. In that room, you will find the second blood stone. When you place the second blood stone on the altar, a third room will open. In the third room, you will find the final blood stone. Place the final blood stone on the altar, and a wall will disappear and a great hall will be before you. Continue down the hall, killing all enemies in your way. At the end of the hallway you will find Arkaine's Valor Armor. | ||||||||||||


| ||||||||||||
|
This quest is only available in single-player games. After you enter the catacombs, return to town and talk to Griswold. He will speak of the Magic Rock which he has heard of. If you return it to him, he will give you a reward. Return level 5 of the catacombs and search for the Magic Rock. Once you find it, return it to Griswold and receive the Empyrean Band. | ||||||||||||


| ||||||||||||
|
This quest is only available in single-player games. "Beyond the hall of heroes lies the chamber of bone. Eternal death awaits any who would seek to steal the treasures secured within this room. So speaks the lord of terror, and so it is written." In sixth level of the catacombs, find a book that tells of great treasures found in The Chamber of Bone. After reading the book, look for a newly revealed area containing a staircase surrounded by 8 pillars. Go up the staircase, into a chamber where there are 2 levers. Kill all the monsters, then pull the levers to reveal rooms containing magical items. Read the Ancient Tome to gain a Guardian spell level. | ||||||||||||

| ||||||||||||
|
This quest is only available in single-player games. Read the book on level 7 to recite a poem about the Halls of the Blind. After you read it through, you will be able to access a new room in the shape of a figure eight. Enter the room and search one of the adjacent rooms for the Optic Amulet. Once you find it, this quest has been completed. | ||||||||||||

| ||||||||||||
|
This quest is only available in single-player games. In Level 8 of the catacombs, you should encounter Zhar the Mad in a library. Talk to him, and he will give you a book to keep you busy while he goes about his work. Take the book and all the scrolls around you, but do not take the book from the bookcase. When you feel you are ready to fight him, take the book from the bookcase. Zhar will get mad that you have done this, and will fight you. He will teleport around the room and shoot fireballs with his staff, making him very hard to get a hit on him without being hurt yourself. To make this much easier, Stone Curse him when he is visible to get some easy hits on him. | ||||||||||||

| ||||||||||||
|
This quest is only available in single-player games. Search level 9 of the caverns for a Fungal Tome. Once you find it, go to town and talk to Adria. She will tell you that in order to make use of it, she will need a Black Mushroom. Return to the caves and search for a patch of mushrooms within. Take the Black Mushroom and return to Adria with it. She will say that she now needs an elixir from Pepin. Ask Pepin for the elixir, and he will say that he will need a demon's brain to create such an elixir. Return to the caves and kill any demon. His brain will pop out. Grab it and return to Pepin for the elixir. Go back to Adria with the elixir, and she will say that she does not need it any more. Drink the elixir to raise your all your base stats by three. If you don't use it right away, it will not work. | ||||||||||||


| ||||||||||||
|
This quest is only available in single-player games. After you enter deep into the caves, return to town and talk to Griswold. He will speak of the Anvil of Fury which he has heard of, and will tell you that if he has this anvil, he can craft you a truly powerful weapon. On Level 10 of the caves, out on a peninsula of land which stretches into the lava, you will find the Anvil of Fury, surrounded by a large number of creatures. Kill them, and return the anvil to Griswold for Griswold's Edge, a very good sword. | ||||||||||||


| ||||||||||||
|
This quest is only available in single-player games. Later in the game you will find a Steel Tome that talks about the Warlord of Blood. Proceed down to Level 13 to find him; he will be in a room guarding the entrance down to Level 14 along with a few other Blood Knights. To kill him easily, lure out each of his escort Blood Knights one by one. With time and patience, you should be able to lure most of them out without provoking the Warlord to come after you. When you feel that you are ready, get close to him and retreat. He should follow you. Exit the room which he is in to give yourself some space, then fight him to the death. After you kill him, enter back into the room he was in to get some magical armor and weapons. When you have collected all the items that you want, go on down to Level 14. | ||||||||||||

| ||||||||||||
|
This quest is only available in single-player games. Find Lachdanan on Level 14 and talk to him. He will not attack you, and will explain his story of how he was one of King Leoric's Knights until a curse came upon him. He is the only one of the Blood Knights which has stood the curse and kept his sanity, and requests that you find him a golden potion so he can end his life without being eternally damned. Head down to Level 15 and search for this potion. Once you find it, return to Lachdanan and give it to him. He will give you give you the Veil of Steel and, after he kills himself, he will drop a magical item for your use. He is very vunerable to fireballs and holy bolt. | ||||||||||||


| ||||||||||||
|
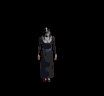
This quest is available in both single and multi-player games. Search Level 15 until you find the Staff of Lazarus. Once you find it, pick it up and head back to town with it. Talk to Cain, and he will identify the owner of the staff and explain to you how Lazarus must be killed at this point of time. He will take the staff from you and send you on your way. "This does not bode well, for it confirms my darkest fears. While I did not allow myself to believe the ancient legends, I cannot deny them now. Perhaps the time has come to reveal who I am." "My true name is Deckard Cain the Elder, and I am the last descendant of an ancient brotherhood that was dedicated to safeguarding the secrets of a timeless evil. An evil that quite obviously has now been released." "The Archbishop Lazarus, once King Leoric's most trusted advisor, led a party of simple townsfolk into the labyrinth to find the king's missing son, Albrecht. Quite some time passed before they returned, and only a few of them escaped with their lives." "Curse me for a fool! I should have suspected his veiled treachery then. It must have been Lazarus himself who kidnapped Albrecht and has since hidden him within the labyrinth. I do not understand why the Archbishop turned to the darkness, or what his interest is in the child. Unless he means to sacrifice him to his dark master." "That must be what he has planned! The survivors of his rescue party say that Lazarus was last seen running into the deepest bowels of the dungeon. You must hurry and save the prince from the sacrificial blade of this demented fiend." Head back down to Level 15 and you will find a red portal near the marble pentagram. Enter the portal to enter Lazarus' lair, which is a small chamber where a young boy lies on a sacrificial altar. Once you enter his lair, proceed to go through it killing all the Hell Spawns and other enemies you find. Once you have cleared out all the enemies you can find, search for a gray circle on the ground (there should be two or three). Enter it, and you will be in an area where some Hell Spawns were. Enter the other gray circle, and you should be in another area where Hell Spawns were. Now retreat to where you started the level, a third gray circle should be on the ground. Enter it to go straight to Lazarus. After the cut scene of him, you should start off in a room with Lazarus and many Hell Spawns. So long as you do not stand directly in front of the door, no one inside will be awakened. Clear out everybody around the chamber. Then stand at the mouth of the entrance, on one of the tiles adjacent to the wall but not within the threshold itself. Stand and fire in where you can, listening for the noise counselors or succubi make when hit. There are two counselors (one on each side) who you can take out without waking anybody else up. Sometimes you might be able to draw them out, and then kill them alone in safety away from the chamber. Once those two are dead, stand outside the room and fire in randomly, making sure you haven't missed anyone. The next two creatures to leave are two light-source succubi, Red Vex and Blackjade. They can be killed one at a time if you are cautious. To draw them out, step into the threshold of the chamber--but do not cross it. Immediately step back out. This should draw out one of the succubi light sources. Kill her, and then repeat for the other light source. Then try to take out the two succubi that are hanging out along the back wall. Finally, cross the threshold, thereby awakening Lazarus. He will begin his speech once awakened. Step back onto the threshold and fire until you hit him. You should be able to take him out before his speech ends, and kill him to complete the quest | ||||||||||||


| ||||||||||||
|
After you have killed Lazarus, head back to Cain in town. He will now tell you of the quest of Diablo, Lord of Terror. Retreat back down to Level 15, and walk into the pentagram to enter his lair. "Your story is quite grim, my friend. Lazarus will surely burn in hell for his horrific deed. The boy that you describe is not our prince, but I believe Albrecht may yet be in danger. The symbol of power that you speak of must be a portal into the very heart of the labyrinth." "Know this, my friend--the evil that you move against is the dark lord of Terror. He is known to mortal men as Diablo. It was he who was imprisoned within the labyrinth many centuries ago, and I fear that he seeks to once again sew chaos in the realm of mankind. You must venture through the portal and destroy Diablo before it is too late!" To make this level very simple, fight your way down to the lower-left hand corner of the map. There you should find an enclosed room, with many enemies and creatures scattered around it. Kill them all, and ready a spell or scroll of Telekinesis. Inside the room you should be able to see two levers. Both must be pulled in order to open the room with Diablo in it. Use Telekinesis to pull them both. Then head down to the lower-right hand corner of the level. You should find Diablo there along with many other enemies. Try to lure just Diablo out of the room. Once you do, lead him to some other part of the level away from all other creatures. Once it's just you and him, go in for the kill to see the end game sequence. In multiplayer, be sure to pick up all items you want to keep before killing Diablo. If someone is left in the game, and that person is not on level 16 when Diablo dies, the game will not close, and you will be able to re-join the game and pick up your items. | ||||||||||||

![]()
THE GREAT CONFLICT
Started by reading book on level 4. No quest.
"Take heed and bear witness to the truths that lie herein, for they are the last legacy of the Horadrim. There is a war that rages on even now, beyond the fields that we know--between the utopian kingdoms of the high heavens and the chaotic pits of the burning hells. This war is known as the great conflict, and it has raged and burned longer than any of the stars in the sky. Neither side ever gains sway for long as the forces of light and darkness constantly vie for control over all creation."
THE SIN WAR
Started by reading book on level 5. No quest.
THE BLACK KING
Started by reading book on level 12. No quest.
"Hail and sacrifice to Diablo, Lord of Terror and Destroyer of Souls. When I awoke my master from his sleep, he attempted to posses a mortal's form. Diablo attempted to claim the body of King Leoric, but my master was too weak from his imprisonment. My lord required a simple and innocent anchor to this world, and so found the boy Albrecht perfect for the task. While the good King Leoric was left maddened from my lord's unsuccessful possession, I kidnapped his son Albrecht. I now await Diablo's call and pray that I will be rewarded when he at last emerges as the lord of this world."
![]()
HELLFIRE QUESTS
| ||||||||||||
|
You can start this quest as soon as you have cleared out the catacombs, or if you have a level 15 character. You will find Lester near the grazing cows; he will ask you to blow the entrance to the nest open so that he can take his cows to the orchard, and will give you the Rune Bomb. The entrance to the nest will be found across the new bridge near Farnham. When you have completed the quest, he will reward you with the Auric Amulet which doubles your gold-carrying capacity. | ||||||||||||


| ||||||||||||
|
This is actually a two-part quest. For the first part, you must kill the Defiler, who can be found on the fourth level of the hive. Once dead, she will give you the Cathedral Map. For the second part of the quest, you must return to town and speak to Gillian. She will give you the Grave Matters quest. You must now take the Cathedral Map to the churchyard and drop it on the new grave that you will find there. This will open the doorway to the Demon Crypts. | ||||||||||||


| ||||||||||||
|
More of a utility than a quest. The Cornerstone of the World can be used to transfer items from one single player character to another. When you first find the Cornerstone, you will find a pile of gold on it. If you place another item on the Cornerstone, then exit your game, and start a new game with another character that is of the same experience level, you will find the item you dropped on the Cornerstone. | ||||||||||||
| ||||||||||||
|
While journeying through the Demon Crypts, you will find 3 torn notes lying on the floor. Collect all 3 torn notes from Skulken's journal, and when combined you will get a message that you help you in weakening Na-Krul with the spell books that are found outside his chamber. | ||||||||||||


| Text of the Reconstructed Note |
|---|
|
Whoever finds this scroll is charged with stopping the demonic creature that lies within these walls. My time is over. Even now, its hellish minions claw at the frail door behind which I hide. I have hobbled the demon with arcane magic and encased it within great walls, but I fear that will not be enough. The spells found in my three grimoires will provide you protected entrance to this domain, but only if cast in their proper sequence. The levers at the entryway will remove the barriers and free the demon; touch them not! Use only these spells to gain entry or his power may be too great for you to defeat. The Reconstructed Note is of no value; no one in town will buy it from you. If you place it on the Cornerstone of the World, you will hear the following: And in the year of the golden light, it was so decreed that a great cathedral be raised. The cornerstone of this holy place was to be carved from the translucent stone Antyrael, named for the angel who shared his power with the Horadrim. In the year of drawing shadows, the ground shook and the cathedral shattered and fell. As the building of catacombs and castles began and man stood against the ravages of the Sin War, the ruins were scavenged for their stones. And so it was that the cornerstone vanished from the eyes of man. The stone was of this world - and of all worlds - as the light is both within things and beyond all things. Light and unity are the products of this holy foundation, a unity of purpose and a unity of posession. |
| ||||||||||||
|
You get this quest by reading the seven journals scattered throughout the four levels of the Demon Crypts, and the Reconstructed Note. Killing Na-Krul will complete this quest. To weaken Na-Krul, read the books in front of his chamber in this order: in spiritu sanctum praedictum otium efficio obitus ut inimicus Once you have done this, Na-Krul's chamber will open and he will appear, in a weakened state. If you do not want to weaken Na-Krul, then simply pull the levers instead of reading the books. His death will give you three magic items (a bow, staff, and great sword), and the book of Apocalypse. When Na-Krul appears, he will say the following: Ha, ha, ha...Free! Ha, ha, ha...Free to confront the one who banished me to the void, Diablo! And free to reward you, little mortal with your death! If you have added the command.txt option*, you will instead hear: Hi! I'm free, free to confront the little man who banished me, Diablo. Hi, Everybody, and I'm free to reward you, little mortal, with these Aerosmith tickets. You'll be getting backstage passes, you'll get to meet Steven Tyler and the whole band. This Friday at the Coliseum. Thanks for getting me out of there. By the way, I'm gonna have to kill you. (pause) I'll be right back with the traffic and weather together. | ||||||||||||

| ||||||||||||
|
This quest is only available if you use the command.txt option.* This quest replaces the Farmer's Orchard quest. Instead of Lester, you will meet The Complete Nut standing by the cows, who will give you the Rune Bomb and ask you to retrieve his brown suit from his home, which is in the Nest. You will also find his gray suit on level 3 of the Nest, but it is of no value. On the fourth level, you will find his brown suit; when you return it to him, he will give you the Bovine Plate. | ||||||||||||


| ||||||||||||
|
This quest is only available if you use the command.txt option*. After blowing open the entrance to the Nest, and entering level one, come back to town. You will find a little girl, Celia, next to a tree on the way to Adria's shack. She will tell you that her playpal, Theodore, was taken by a big bug in the Nest and ask you to rescue him. On the third level of the Nest, you will meet the Hork Demon. Kill him and he will surrender Theodore to you. Give Theodore to Celia, and she will give you a magic amulet. | ||||||||||||


command.txt option
For directions, go to our How to add the hidden characters and quests to Hellfire Page
![]()
Return to Diablo Hellfire Page
BLIZZARD and Diablo are trademarks of Blizzard Entertainment.
HELLFIRE is a trademark of Sierra On-Line/Synergistic Software.